Classic Car Maintenance Guide: Preserving Your Vintage Automobile for Generations
Classic car maintenance guide: ZDDP oils, ethanol-proof fuel systems, IAT coolant, brake fluid, ignition, cooling, and tire safety to keep your vintage car running.…
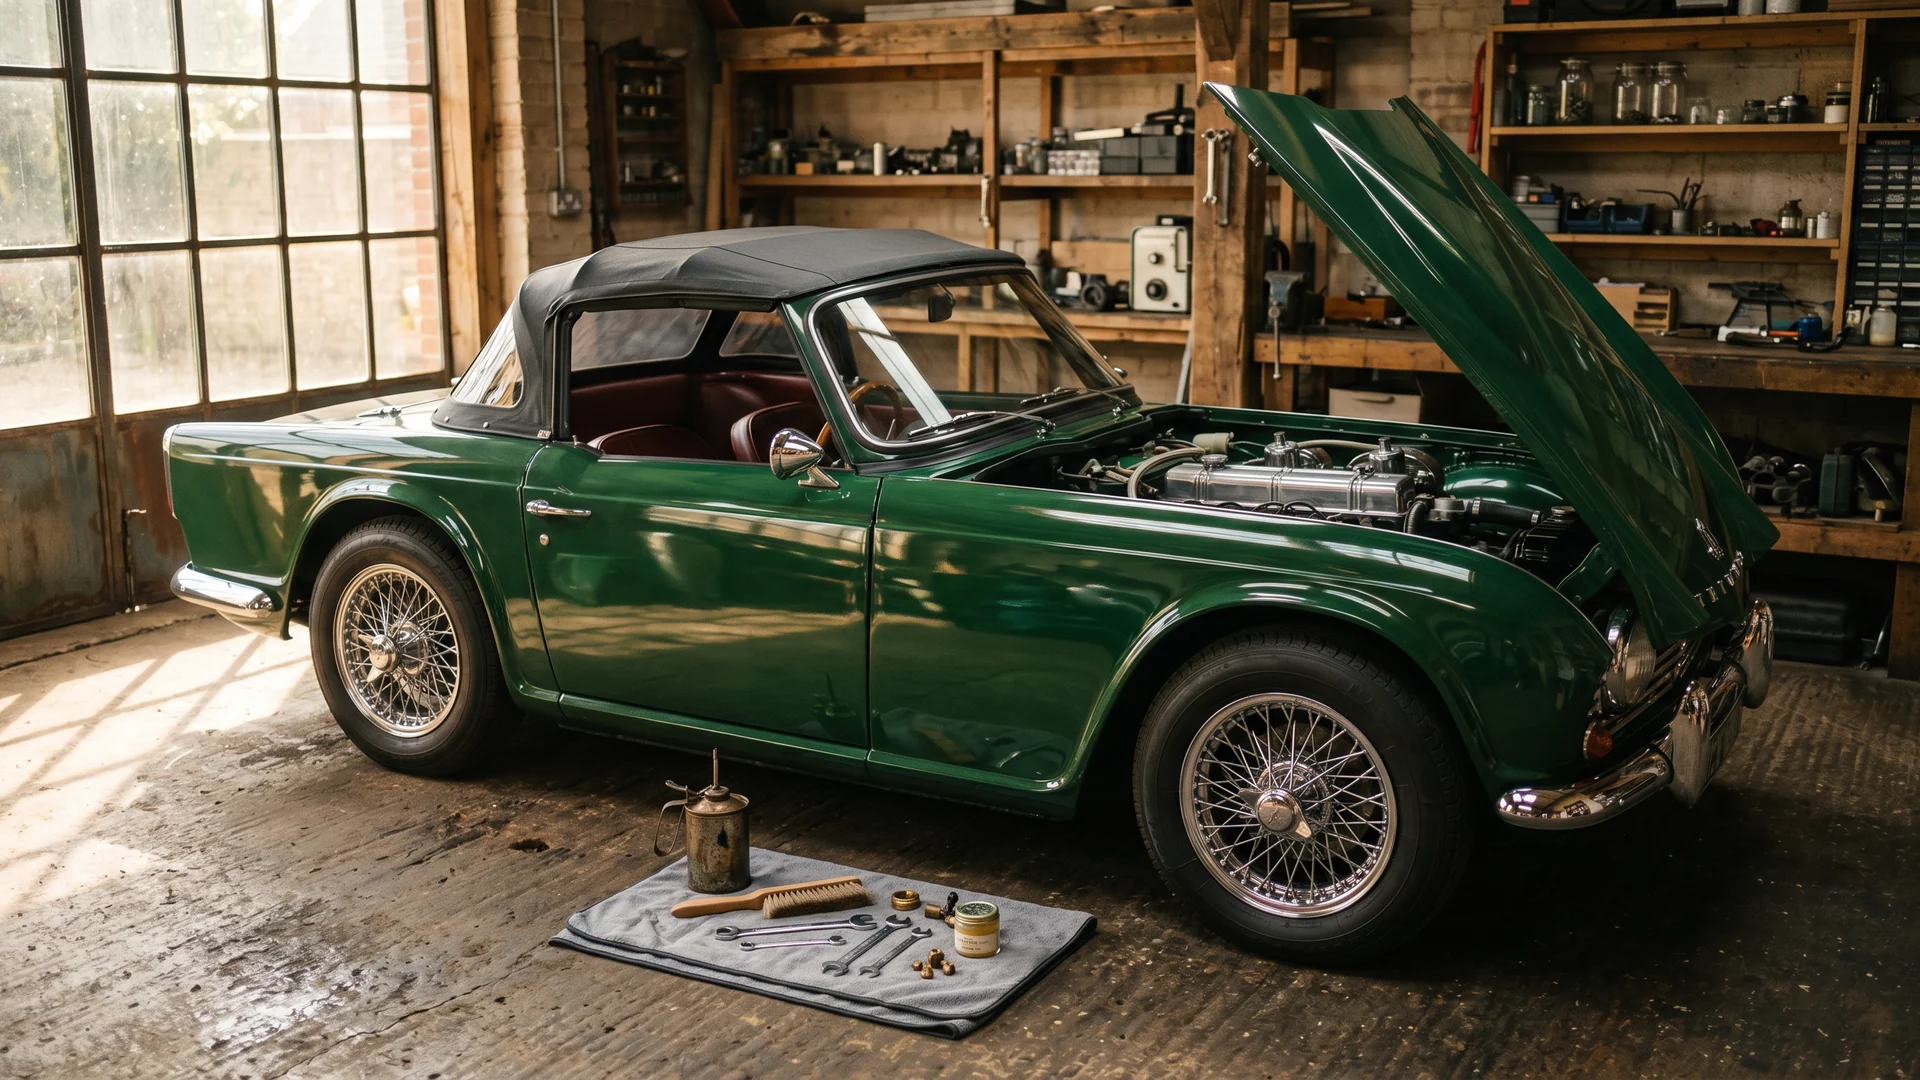
Classic-car maintenance means using ZDDP oils, ethanol-resistant fuel parts, IAT coolant, fresh brake fluid, and a seasonal service rhythm to keep vintage engines running safely.
Key Takeaways
- Flat-tappet engines, including the Chevrolet small-block V8 and Jaguar XK six, need 1,200 to 1,400 ppm of ZDDP from oils like Valvoline VR1, Driven GP-1, or Joe Gibbs Driven Hot Rod to prevent cam-lobe and lifter wear costing $3,000 to $8,000 to repair.
- Cars with original copper-and-brass radiators require traditional green IAT coolant changed every two years, because modern OAT coolant attacks solder joints, gaskets, and water-pump seals.
- DOT 3 and DOT 4 brake fluid must be flushed every two years because it absorbs moisture, and single-circuit master cylinders should be converted to dual-circuit as the most important safety upgrade.
- E10 ethanol fuel demands ethanol-resistant barrier hose (Gates Barricade, Cohline), dual fuel filters, rebuilt carburetors, and stabilizers like Sta-Bil 360 Marine, plus ethanol-free gas for storage.
- Pertronix Ignitor electronic-ignition modules cost $100 to $200, fit inside the original distributor, install in under an hour, and are fully reversible for owners who want to return to points.
- Overheating is the most common roadside breakdown; fixes include re-coring the radiator ($300 to $800), replacing the fan clutch and thermostat, fitting a fan shroud, and setting timing to factory spec.
- Tires older than six years should be replaced regardless of tread, and those over ten years are dangerous; read the four-digit DOT date code such as 2521 for the 25th week of 2021.
🌐 Also available in: Deutsch
The Classic Car Maintenance Guide: Keeping Vintage Machinery Running Reliably and Safely
Owning a classic car is a commitment to mechanical stewardship that extends far beyond the purchase transaction. Unlike modern vehicles that have largely evolved into sealed, computer-managed appliances requiring little more than oil changes at intervals determined by algorithms monitoring your driving patterns, classic cars demand genuine engagement, mechanical understanding, and a willingness either to get your hands dirty on a regular basis or to develop a relationship with a specialist who can do so on your behalf. The reward for this commitment is a driving experience of tactility, sound, and connection that no modern car, however fast or luxurious, can replicate. This guide covers the essential maintenance disciplines for classic-car ownership, organized by system, with specific practical advice for the most commonly collected marques and eras, drawn from the collective experience of owners, restorers, and marque specialists who have spent decades keeping these machines on the road.
The Fluids: Understanding What Your Engine Actually Needs
Fluid management for classic cars differs fundamentally from modern practice, and using the wrong fluids can cause damage that is both expensive and completely avoidable with knowledge and attention. The most critical distinction concerns zinc dialkyldithiophosphate, universally abbreviated as ZDDP, which is a critical anti-wear additive that has been dramatically reduced in modern engine oils because it can, over time, degrade the catalytic converters that modern emissions regulations require. Classic engines with flat-tappet camshafts, a category that includes virtually every pushrod engine built before the mid-1990s, from the Chevrolet small-block V8 that powered millions of American cars to the Jaguar XK six-cylinder that defined British sports-car engines for a generation, require ZDDP levels of 1,200 to 1,400 parts per million to prevent the catastrophic wear pattern known as cam-lobe and lifter failure. When a flat-tappet camshaft operates without adequate ZDDP protection, the sliding contact between the cam lobe and the lifter face generates localized heat and pressure that overwhelms the oil’s ability to maintain a protective film, resulting in metal-to-metal contact that wears the hardened surfaces away. Once this process begins, it accelerates rapidly and the engine will soon develop a ticking noise that progresses to a misfire and ultimately to the need for a complete camshaft and lifter replacement costing $3,000 to $8,000 or more depending on the engine and the shop performing the work. Oils specifically formulated for classic engines and clearly labeled with their ZDDP content include Valvoline VR1 Racing Oil, Driven GP-1, Joe Gibbs Driven Hot Rod Oil, Brad Penn Penn Grade 1, and several other specialist products. Do not use modern synthetic oils in a flat-tappet engine without first verifying that the oil contains adequate ZDDP. The cost of a wiped camshaft is not theoretical; it happens regularly to owners who assumed that any quality oil would be adequate and learned otherwise the hard way.
Coolant for classic cars demands similarly careful attention. Traditional green ethylene glycol coolant, classified as Inorganic Additive Technology or IAT coolant, is compatible with the copper, brass, cast-iron, and solder components that constitute the cooling systems of cars built before the 1990s. Modern Organic Acid Technology coolants, the OAT formulations used in virtually all contemporary vehicles, can aggressively attack older solder joints, certain gasket materials, and the seals used in older water pumps, causing leaks that develop slowly and are difficult to diagnose. If your classic still has its original radiator, a copper-and-brass unit assembled with soldered joints rather than the aluminum-and-plastic construction of modern radiators, use a traditional IAT coolant and change it every two years without exception. For cars that sit for extended periods between drives, coolant test strips that measure both pH and freeze-point protection are a wise and inexpensive investment that can prevent the internal corrosion that silently destroys cooling systems.
Brake fluid is aggressively hygroscopic, meaning it actively absorbs moisture from the atmosphere over time through microscopic pores in rubber hoses, seals, and even the reservoir vent. As moisture content increases, the fluid’s boiling point drops precipitously, and internal corrosion begins to attack caliper bores, wheel cylinder walls, and master cylinder internals. DOT 3 and DOT 4 brake fluids should be completely flushed and replaced every two years regardless of how few miles the car has covered. For cars driven enthusiastically or subjected to the occasional track day, an annual flush with a high-performance DOT 4 fluid such as ATE Typ 200, Motul RBF 600, or Castrol SRF is cheap insurance against the brake fade that occurs when moisture-contaminated fluid boils under hard use. Silicone-based DOT 5 fluid, which should not be confused with glycol-based DOT 5.1 despite the confusingly similar designation, does not absorb moisture and is therefore favored by some collectors for cars that sit for months at a time in humid environments. However, DOT 5 is incompatible with anti-lock braking systems, can cause seal-swelling issues in some older braking components, and must never be mixed with glycol-based fluids. Consult a marque specialist who knows your specific car before making any change to the brake fluid specification.
Fuel Systems in the Ethanol Era: Managing Modern Gasoline
Modern pump gasoline containing 10 percent ethanol, the E10 blend that is ubiquitous across the United States and increasingly common worldwide, presents multiple challenges for classic fuel systems that were designed in an era when gasoline was purely a petroleum product with no alcohol content. Ethanol is a powerful and aggressive solvent that can loosen decades of accumulated varnish deposits from the interior surfaces of fuel tanks, instantly sending a wave of debris downstream to clog fuel filters, fuel pumps, and the tiny orifices inside carburetors. It is hygroscopic, meaning it actively pulls moisture from the surrounding air, promoting corrosion in steel fuel tanks and steel fuel lines that were never designed to handle water-contaminated fuel. It chemically attacks older rubber fuel lines, gaskets, O-rings, and the internal components of carburetors that were formulated for pure gasoline and are not resistant to alcohol degradation. And it has a measurably lower energy density than pure gasoline, contributing to lean-running conditions that can cause overheating, vapor lock in hot weather, and the hard-starting-when-hot syndrome that plagues many classic cars in summer conditions.
The mitigations are straightforward but must be implemented systematically rather than piecemeal. Replace every rubber fuel line in the car with modern ethanol-resistant barrier hose; Gates Barricade, Cohline, and similar products are designed for exactly this application and are widely available. Install a high-quality fuel filter before the fuel pump and a second filter immediately before the carburetor or carburetors to catch any debris that might otherwise clog the delicate internal passages of the fuel-metering system. Rebuild the carburetor or carburetors with modern ethanol-resistant components, including the accelerator pump diaphragm, the needle and seat assembly, and all gaskets and O-rings; specialists like Daytona Parts, Burlen Fuel Systems for SU carburetors, and Pierce Manifolds for Weber carburetors supply complete rebuild kits with the correct modern materials. Use a high-quality fuel stabilizer in every tank of fuel; Sta-Bil 360 Marine and Lucas Safeguard Ethanol Fuel Conditioner are specifically formulated to address the corrosion and phase-separation issues that ethanol-blended fuels cause. For cars being stored over winter or for extended periods, fill the fuel tank completely to the brim with ethanol-free gasoline if it is available in your area, check the listings at pure-gas.org to find stations that sell it, and add the appropriate amount of fuel stabilizer. A full tank leaves no air space for moisture to condense into the fuel, and ethanol-free gasoline eliminates the phase-separation risk entirely.
Ignition Systems: Points, Condensers, and Modern Upgrades
Classic ignition systems based on mechanical contact points, a condenser, an ignition coil, and a distributor are fundamentally simple, field-serviceable with basic tools, and, in the hands of an owner who understands them, capable of providing reliable service for thousands of miles. They are also maddeningly finicky when neglected or maladjusted. The contact points must be gapped correctly, typically 0.014 to 0.016 inches for most four- and six-cylinder engines and 0.016 to 0.019 inches for V8 engines, though the specific specification for your car should be confirmed from the factory service manual, and the dwell angle, which measures the number of degrees of distributor rotation during which the points remain closed to saturate the coil, must be verified with a dwell meter. A worn distributor shaft bushing that allows the shaft to wobble even slightly as it rotates will cause erratic dwell that produces misfires impossible to diagnose without understanding the mechanical relationship between shaft stability and point gap. The condenser, which is a capacitor that suppresses arcing at the points and prevents them from burning prematurely, is the single most common failure point in a points-based ignition system and should be carried as a spare in the glovebox along with a spare set of points and the simple tools needed to change them at the roadside.
Many owners of driver-quality classics choose to convert from points to electronic ignition for the substantial improvement in reliability and the elimination of periodic point-gapping and dwell-adjustment maintenance. Pertronix Ignitor modules, which replace the points and condenser inside the original distributor housing while leaving the distributor’s external appearance completely unchanged, are the most common and cost-effective upgrade, typically costing $100 to $200 and installable in well under an hour with basic hand tools. For owners seeking a more comprehensive upgrade, MSD multiple-spark-discharge ignition boxes provide a significantly hotter spark and a multi-spark discharge at lower engine speeds that improves combustion and throttle response. The 123Ignition distributor line offers Bluetooth-programmable advance curves that allow the owner to optimize ignition timing for modern fuels and driving conditions without the trial-and-error of changing mechanical advance springs and weights. Purists will argue that points ignition is part of the classic-car experience, and at the concours level, an electronic ignition module visible inside the distributor will draw deductions from judges who inspect such details. For a car that is driven regularly on modern roads in modern traffic, however, the reliability improvement from electronic ignition is substantial and the modification is completely reversible if a future owner prefers originality.
Carburetor Tuning and Troubleshooting
Carburetion is the art at the very heart of classic-car maintenance, and mastering it transforms the ownership experience. Single-carburetor setups, the SU HS6 on an MGB, the Holley 4160 four-barrel on a 1960s Mustang, the Zenith-Stromberg CD175 on a Triumph TR6, are relatively straightforward to tune with basic tools and a methodical approach. Multiple-carburetor installations are another matter entirely. Three DCOE-sidedraft Webers on a Jaguar XK engine, six on a Ferrari Colombo V12, or twin SU carburetors on an Austin-Healey 3000 demand precise synchronization using a flow meter, a Uni-Syn, an STE Synchrometer, or a Carbtune manometer, to ensure that each carburetor throat draws exactly the same volume of air at idle as every other throat. The tuning procedure is iterative: adjust each idle mixture screw for the highest manifold vacuum or the smoothest, highest idle speed, then balance the airflow across all throats using the flow meter and the throttle-stop adjustment screws, then repeat the entire process because adjusting the airflow balance changes the mixture requirements. It is work that rewards patience and punishes haste, but the result, an engine that idles with turbine smoothness and responds instantly to the throttle, is one of the great satisfactions of classic-car ownership.
Common carburetor symptoms and their most likely causes form a diagnostic framework every classic owner should know. Hesitation or stumbling on acceleration, particularly when the throttle is opened quickly, points to a worn or misadjusted accelerator pump circuit, this is especially common on Holley and Carter AFB four-barrel carburetors, where the accelerator pump diaphragm hardens with age and fuel exposure. Rich running, characterized by black smoke from the exhaust, a strong fuel smell at idle, and spark plugs that emerge from the engine covered in black soot, typically indicates a float level set too high, a needle-and-seat assembly worn to the point of leaking, or an automatic choke that is stuck in the closed position and never releases as the engine warms up. Lean running and backfiring through the carburetor under load suggest a vacuum leak somewhere in the intake system, clogged jets from ethanol-loosened debris that has traveled downstream from the fuel tank, or a float level set too low. A wideband air-fuel-ratio gauge, temporarily installed by welding an oxygen-sensor bung into the exhaust system and connecting the gauge to the sensor, transforms carburetor tuning from an art guided by experience and intuition into a science guided by real-time data that leaves no ambiguity about the mixture the engine is receiving.
Cooling Systems: Preventing the Most Common Roadside Failure
Overheating is, by a wide margin, the most common cause of roadside breakdowns in classic cars, and the reasons are straightforward when you understand the system’s limitations. The cooling system in a 1950s, 1960s, or 1970s car was designed for the traffic conditions and average speeds of its era, not for the sustained high-speed running on modern interstates or the prolonged stop-and-go traffic of contemporary suburban sprawl. The radiator may be partially clogged internally with decades of accumulated scale, rust, and sediment, reducing its heat-transfer capacity to a fraction of what it was when new. The solution is a professional rodding-out or a complete re-core, which costs $300 to $800 at a competent radiator shop and restores the radiator to its original efficiency. The fan clutch, if the car is equipped with one, may have deteriorated internally and failed to engage when the airflow through the radiator is insufficient to maintain safe temperatures. Replace it with a new unit from Hayden or Derale; this is straightforward and inexpensive. A missing, damaged, or incorrectly installed fan shroud is critical at idle and low speeds, where the fan must pull air through the entire radiator core rather than simply recirculating hot air from the engine compartment. Reproduction shrouds are available for most popular classics and should be fitted if the original is missing.
Ignition timing that is retarded from the factory specification raises exhaust-gas temperatures dramatically and transfers far more heat into the cooling system than the radiator was designed to reject. Set the timing to the factory specification using a timing light, and verify that the mechanical and vacuum advance mechanisms are functioning correctly. A thermostat that is stuck in the closed position, or even partially closed, or one that has been installed backward, will prevent coolant from circulating through the radiator at all. Replace the thermostat with a new unit of the correct temperature rating, do not remove it entirely, as many shade-tree mechanics have done over the decades, because an engine without a thermostat may circulate coolant so quickly through the radiator that it does not have time to reject its heat, and the result can be worse overheating than the thermostat was causing. Test the new thermostat in a pot of boiling water before installing it to confirm that it opens fully at the specified temperature.
Tires, Brakes, and Electrical: The Safety Trinity
Tires are the most neglected safety item on classic cars, and the neglect is driven by a fundamental misunderstanding of how rubber ages. Tread depth is irrelevant to the safety of a tire that has aged beyond its useful life. Rubber compounds deteriorate through oxidation, losing elasticity, grip, and structural integrity over time regardless of how much tread remains visible. The DOT date code, a four-digit number stamped into the sidewall of every tire sold in the United States, indicates the week and year of manufacture. A code reading “2521” means the twenty-fifth week of 2021. Tires older than six years should be replaced regardless of appearance. Tires older than ten years are genuinely dangerous at any speed and should never be driven on. For classics that cover limited annual mileage, this means replacing tires with near-full tread on a calendar rather than wear basis every six to eight years, an unavoidable cost of safe operation. Classic tire specialists including Coker Tire, Universal Vintage Tire, and Longstone Tyres in the UK offer period-correct sizes, tread patterns, and constructions. Bias-ply tires are correct for pre-1960s authenticity. Modern radials from Vredestein, Michelin, or Pirelli’s classic ranges offer vastly superior road manners for cars that are actually driven.
Brake systems demand regular inspection and maintenance that many owners defer because the consequences of neglect are invisible until they are catastrophic. Drum brakes, standard on most cars through the 1960s and on the rear axles of many cars through the 1970s, must be adjusted periodically to compensate for shoe wear. A brake pedal that is high and soft but pumps up firm with repeated applications is the classic symptom of maladjusted drum brakes. Brake hoses, the flexible rubber lines that connect the rigid chassis lines to the moving suspension components and the brake calipers or wheel cylinders, deteriorate internally over decades in ways that are completely invisible from the outside. The inner lining can swell, partially or completely blocking fluid flow and causing brakes that drag, fail to release, or behave unpredictably. Replace all flexible brake hoses every 10 to 15 years as a matter of routine maintenance, using DOT-approved braided stainless-steel hoses where they are available for your specific car. For vehicles still equipped with single-circuit master cylinders, one reservoir feeding all four brakes through a single hydraulic circuit, meaning that any leak anywhere in the system results in complete brake failure, a dual-circuit conversion is the single most important safety upgrade you can make, and kits are available for most commonly collected models.
Electrical systems in classic cars suffer from a combination of aging wiring with insulation that has become brittle and cracked, corroded connectors that introduce resistance and voltage drop into every circuit, and inadequate grounding that causes all manner of inexplicable and intermittent failures. The British electrical components manufactured by Lucas Industries during the 1950s through 1970s are the subject of a vast body of jokes within the classic-car community, ”Lucas, Prince of Darkness,” “Why do the British drink warm beer? Because Lucas makes their refrigerators”, but the fundamental issue is usually not the components themselves but corrosion at the bullet connectors and inadequate ground paths that prevent current from flowing freely. Systematically clean every connector you can access with DeoxIT contact cleaner, replace any connector that shows green or white corrosion products, and add supplemental ground straps between the engine and chassis and between the battery negative terminal and the body shell. These simple steps eliminate more electrical problems than any component replacement ever will.
The Annual Maintenance Rhythm
A disciplined maintenance schedule, followed without exception, prevents most classic-car failures before they occur. In the spring, as you prepare the car for the driving season: change the oil and filter, inspect and adjust the points, check the ignition timing, inspect every belt and hose for cracks or softness, check tire pressures and date codes, load-test the battery, verify the operation of every light and signal, and conduct a thorough test drive while listening for any new noises or noting any new behaviors. During the driving season, check all fluid levels at every fuel stop, oil, coolant, brake fluid, and power-steering fluid if equipped, and note any consumption patterns that might indicate a developing problem. Carry a basic tool kit appropriate to your car, spare points and a condenser if the car still uses points ignition, spare fuses, a fan belt, a quart of oil, and a properly mounted and recently inspected fire extinguisher. In the fall, when the car goes into winter storage: change the oil to remove the acids and contaminants that have accumulated during the season, fill the fuel tank completely, add stabilizer, disconnect the battery or connect a quality maintenance charger like a Battery Tender or CTEK, inflate the tires to their maximum sidewall pressure to prevent flat-spotting during the storage period, place moisture-absorbing desiccant packs inside the passenger compartment, and cover the car with a breathable cotton or flannel cover, never plastic, which traps moisture against the paint and promotes corrosion.
Maintaining a classic car is not a burden to be endured but a ritual to be savored, a series of small, satisfying interactions with a machine that was designed to be understood and maintained by its owner. The owner who understands their car’s systems, who listens to its sounds and responds to its needs before those needs become failures, will enjoy thousands of trouble-free miles while developing a relationship with the machine that no modern car, however capable, can replicate.
Frequently Asked Questions (FAQ)
What is ZDDP and why do classic car engines need it?
ZDDP, or zinc dialkyldithiophosphate, is a critical anti-wear additive that flat-tappet classic engines need at 1,200 to 1,400 parts per million. Modern oils have it reduced to protect catalytic converters. Without enough ZDDP, the cam lobe and lifter suffer metal-to-metal contact, leading to wear that can cost $3,000 to $8,000 to repair.
What kind of coolant should I use in a classic car with an original radiator?
Use traditional green ethylene glycol IAT (Inorganic Additive Technology) coolant and change it every two years. It is compatible with the copper, brass, cast-iron, and solder of pre-1990s cooling systems. Modern OAT coolants aggressively attack older solder joints, gaskets, and water-pump seals, causing slow leaks that are difficult to diagnose.
How does ethanol in modern gasoline harm a classic car fuel system?
Ethanol acts as an aggressive solvent that loosens varnish and clogs filters and carburetors, absorbs moisture that corrodes steel tanks and lines, and chemically attacks older rubber lines, gaskets, and O-rings. Its lower energy density causes lean running, overheating, vapor lock, and hard hot-starting. The fixes include barrier hose, dual filters, ethanol-resistant carburetor rebuilds, and stabilizer.
How often should I change the brake fluid in a vintage car?
Flush and replace DOT 3 and DOT 4 brake fluid every two years regardless of mileage, because it is hygroscopic and absorbs moisture that lowers its boiling point and corrodes internals. Cars driven hard or tracked benefit from an annual flush with high-performance DOT 4 such as ATE Typ 200, Motul RBF 600, or Castrol SRF.
Should I convert my classic car from points to electronic ignition?
For a car driven regularly on modern roads, electronic ignition delivers a substantial reliability improvement and eliminates point-gapping and dwell adjustment. Pertronix Ignitor modules cost $100 to $200, fit inside the original distributor, and install in under an hour. The change is fully reversible, though it draws deductions at concours-level judging.
Why do classic cars overheat and how can I prevent it?
Overheating is the most common roadside breakdown because old cooling systems were built for slower-era traffic and clog internally with scale and rust. Prevent it by re-coring the radiator for $300 to $800, replacing a failed fan clutch and thermostat, fitting a proper fan shroud, and setting ignition timing to the factory specification.
How do I know when classic car tires are too old to drive safely?
Read the four-digit DOT date code stamped on the sidewall; a code like 2521 means the 25th week of 2021. Rubber deteriorates through oxidation regardless of tread depth, so replace tires older than six years and never drive on tires older than ten years. Low-mileage classics need replacement every six to eight years.
What maintenance should I do before storing a classic car for winter?
In the fall, change the oil to remove accumulated acids, fill the fuel tank completely and add stabilizer, disconnect the battery or attach a maintenance charger like a Battery Tender or CTEK, inflate tires to maximum sidewall pressure to prevent flat-spotting, add desiccant packs inside, and cover the car with breathable cotton or flannel, never plastic.
More from Blog

The Future of Classic Car Collecting: Trends Shaping the Next Generation
The future of classic car collecting: why 2035 ICE bans spare existing cars, plus e-fuels, shifting demographics, electromods and fractional ownership…
Classic Car Insurance Guide: Protecting Your Vintage Investment
Classic car insurance guide: why agreed-value policies beat stated and actual cash value, how Hagerty, Grundy and Chubb compare, plus costs and covera…
Classic Car History Timeline: From Benz to the Modern Collector Era
Classic car history timeline from the 1886 Benz Patent-Motorwagen through coachbuilding, muscle cars and supercars to modern collectibles. Discover th…